How to Make a No-Sew Lay Flat Journal, an Easy DIY for Beginners
Full disclosure, darlings! Some of the links sprinkled throughout this post are affiliate links. If you decide to treat yourself through them, I’ll get a tiny percentage – a little thank you for my recommendations! Rest assured, your price remains the same; it’s just a fabulous way to show your support!
Ever wanted to make a journal, but felt overwhelmed by the complicated sewing techniques (what actually ARE signatures anyway? why can’t I seem to comprehend a pamphlet stitch? – ever been there??), then this tutorial to make a no-sew lay flat journal is for you. I’ll guide you through a perfect for beginners technique to make a beautiful journal where no sewing is involved, AND it opens up flat – making it a dream to journal in.
Just because this no-sew method is fantastic for beginners, even seasoned journal makers will appreciate its simplicity. It’s intuitive – so you can easily get into that creative flow state, letting your creativity guide you without overthinking it! It’s perfect for those times when you want to make something without the constraints of more complex techniques.
Convinced yet? Great – then let’s dive in!
Why You’ll Love This No-Sew Junk Journal
This project is a game-changer for beginner paper crafters and journal makers. The no-sew design means no needles, no stitching, and no fuss—just simple steps to create a unique journal (or a junk journal!). The lay-flat feature makes it perfect for writing, sketching, collaging or adding mixed media elements. And as a bonus, it’s a sustainable way to repurpose old book covers and scrap papers. Whether you’re new to junk journaling or just looking for an easy DIY project, this tutorial is designed with you in mind!
Materials You’ll Need for Your No-Sew Journal
Gather these materials to get started:
- Old book cover (repurpose one from a thrifted or use a damaged book).
- Scrap papers (off-cuts from other projects are great for this, but you could use anything: maps, music sheets, or dyed papers will work beautifully).
- Decorative and journal papers (big enough to fit the size of your book cover).
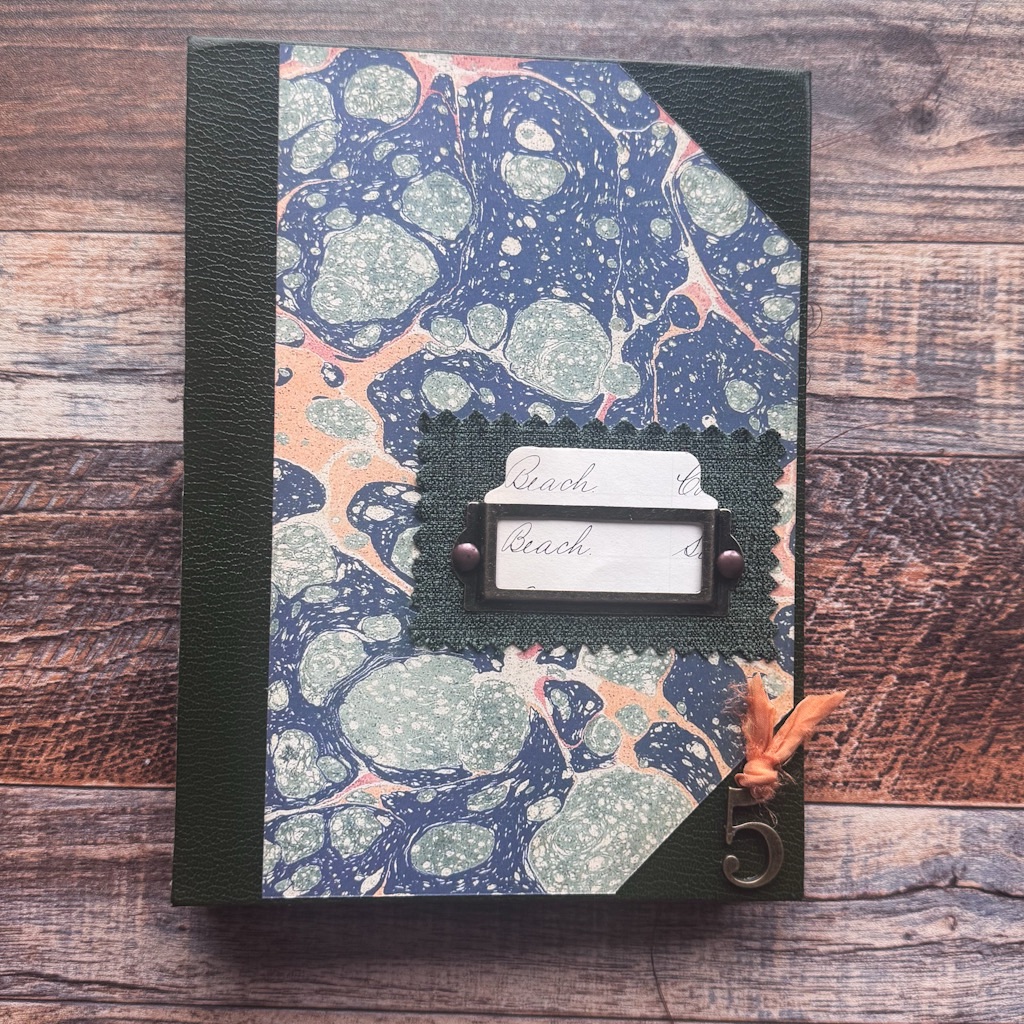
- Cover decorations (book plates, fabric, vintage photographs or metal embellishments—get creative!).
Tools Required:
- A paper cutter or scissors.
- Glue (I like my beacon glue or glitter glue).
- A ruler (or even another book to help you keep things straight).
- Scoreboard (not necessary, but helpful!)
Basic Instructions
To see the step-by-step process in action, watch the embedded video below. I’ll walk you through each part of making your no-sew lay flat junk journal!
- Prepare Your Cover: Take the pages out of the cover carefully and trimming down any ragged edges.
- Gather and Cut your binding hinges: Use your offcuts or other scrap papers to make hinges which will serve as our binding. They should be as tall as your book cover and about 1” wide. Fold them all in half. You can use all the same pattern paper for a cohesive look or use a variety of patterns to give it that boho junk journal vibe.
- Gather and Cut inside pages: Cut your journal pages from old ledgers, coffee dyed papers, printed digital papers or scrapbook papers, making sure you leave enough blank pages to give yourself plenty of room to journal!
- Assemble the Pages: Take 1 hinge and 1 inside page. Glue the page to 1 side of your hinge and set aside to dry. Do this for all your hinges and pages. Be sure to have 1 extra hinge with no paper to use to attach to the back of the book.
- Assemble the book block: now take each of your hinge-page duos and glue them on top of each other, being careful to stack them as straight as possible, so your spine doesn’t end up like the leaning tower of Pisa! I like to put a piece of deli paper between each layer so I don’t end up gluing them together. After this step, give the glue some time to really dry!
- Attach your book covers: Glue the book covers to the front and back of the book block hinges, once again being careful the glue doesn’t seep out and attach your pages together.
- Add end papers: Attach decorative cardstock to the inside of each of your covers to make your journal extra sturdy.
- Decorate Your Cover: Add your personal touch to the cover by adding a book plate or metal embellishments.
Why This Junk Journal Stand Out
The beauty of this project lies in its simplicity and versatility. By using recycled materials like old book covers and scrap papers, you’re not only saving money but also creating something eco-friendly. The no-sew binding makes it accessible for everyone—even kids can join in on the fun! And because the journal lays flat when opened, it’s incredibly practical for writing or crafting.
Watch the Video Tutorial
Ready to start make one of your own? Watch the video below for detailed instructions on how to create your no-sew lay flat junk journal. It’s packed with step-by-step guidance to help you confidently complete this project. This easy DIY is perfect for anyone looking to explore junk journaling without the hassle of sewing. Gather your materials, hit play on the video, and let your creativity shine!
Have questions or want to share your creation? Drop a comment below—I’d love to see what you make!
Wanna make sure you get all my updates and freebies just for subscribers? Just sign up down below and I’ll put you on my mailing list! 👇🏻